• Home
  • Coaching
  • Photography
  • Nutrition

Fit Dude Food | Nutrition Made Tasty | John Hays

Nutrition Made Tasty!

Spaghetti Squash Crust Pizza

September 24, 2020 · by fitdudefood ·

Share
Spaghetti Squash Crust Pizza

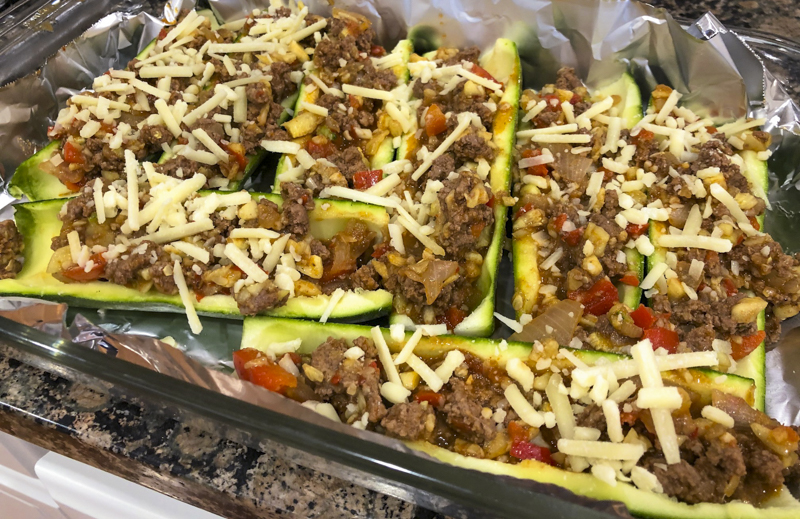
This spaghetti squash crust pizza recipe will blow you away! Who needs carb crust with this? You sure won’t! You’re gonna love this!

We found this recipe in our monthly 2B Mindset recipes that we receive from Beachbody. Krystle’s favorite food is pizza, so this was a no-brainer for us to try. It honestly turned out better than we could have imagined, so now we will try all kinds of pizza flavors in the future.

If you’d like to get monthly recipes like this, email me at johnphays@gmail.com and I can show you how!

Ingredients:

  • 2 spaghetti squashes
  • 1 cup grated parmesan cheese
  • 3 eggs
  • 1.2 tbs dried oregano
  • 1.5 tbs dried basil
  • 1 cup Victoria or Rao marinara (available at Costco)
  • 1.4 cup shredded part-skim mozzarella cheese
  • 1 package uncured pepperoni

Recipe:

  1. First, cut each spaghetti squash in half and scoop out like a jack-o-lantern.
  2. Secondly, using a fork, pierce holes in the skin of each squash. Drizzle olive oil and Himalayan sea salt on each half and place skin up on parchment paper.
  3. Next, bake squash at 400 degrees for 45 minutes or until you can scrape meat with fork.
  4. After that, place squash in a very large bowl, adding eggs and herbs. Mix well.
  5. Then, place squash mixture on parchment covered pizza pan. Press down to form crust.
  6. Next, bake for 20-30 minutes, until top is dry and edges begin to brown.
  7. Finally, add marinara, mozzarella, pepperoni, and any other toppings. Bake for another 10 minutes.

Filed Under: Uncategorized ·

Zucchini Alfredo

June 3, 2020 · by fitdudefood ·

Share

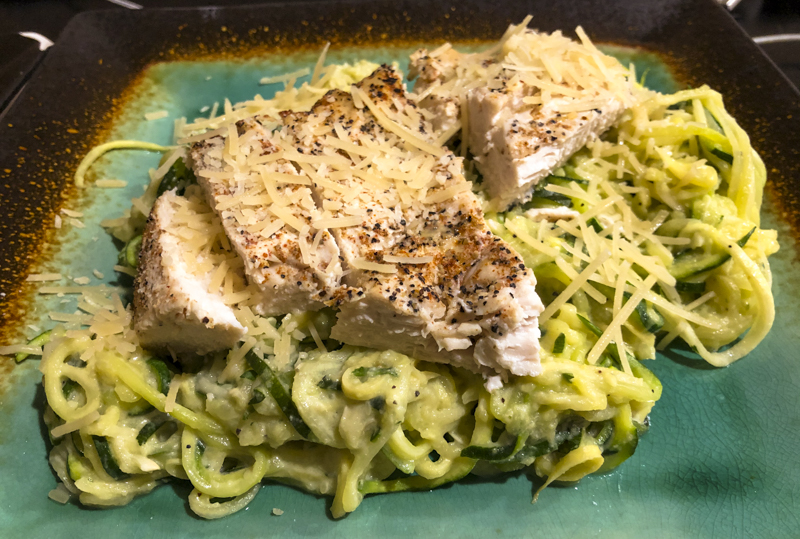
This 2B Mindset recipe was straight up delicious. My wife’s favorite pasta dish is fettuccini alfredo and she was over the moon for this dish. It’s really surprising how the avocado/yogurt combo mimics the alfredo sauce. It’s hard to believe it’s dairy free.

Try the 2B Mindset Program

Zucchini Alfredo Recipe

Ingredients

  • 1/2 medium ripe avocado, mashed
  • 1/4 cup plain Greek yogurt
  • 1/2 tsp ground black pepper
  • 1/2 tsp garlic powder
  • 1/2 tsp onion powder
  • 2 servings protein (grilled chicken, shrimp, etc)
  • 4 medium zucchini, spiralized
  • 2 tsp grated parmesan cheese

Recipe

  1. Combine avocado, yogurt, 1/4 tsp pepper, 1/4 tsp garlic powder, and 1/4 tsp onion powder in a medium bowl.
  2. Heat large nonstick skillet, lightly coated with olive oil, over medium heat.
  3. Add protein, season with remaining 1/4 tsp pepper, remaining 1/4 tsp garlic powder, and remaining 1/4 tsp onion powder; cook, stirring frequently, for 1 minute.
  4. Add zucchini, cook, stirring frequently, for 2-3 minutes. Drain excess liquid from skillet. This step is key, really make sure you cook the liquid out of the zucchini.
  5. Add avocado mixture; cook, stirring frequently, for 1-2 minutes, or until protein is fully cooked, and mixture is heated through.
  6. Evenly divide zucchini mixture between two serving plates. Evenly top with cheese; serve immediately.

Filed Under: Uncategorized · Tagged: alfredo, zucchini, zucchini alfredo

Taco Zucchini Boats

May 18, 2020 · by fitdudefood ·

Share

We discovered this incredibly tasty recipe in the 2B Mindset set of meal plans and recipes, in case you’re looking for other similar recipes.

The 2B Mindset program helps you rethink nutrition without counting calories or having to feel like you’re missing your favorite foods. No foods are off limits, your emotional eating gets under control as you lose weight and keep it off.

TRY THE 2B MINDSET PROGRAM

Taco Zucchini Boats

(Makes 2 servings, 3 boats each)

Total Time: 57 min.

Prep Time: 15 min.

Cooking Time: 42 min.

Ingredients:

  • 3 medium zucchini, cut in half lengthwise
  • 1/4 cup chopped onion
  • 1/4 cup chopped red bell pepper
  • 1 clove garlic
  • 12 oz raw 93% lean ground turkey breast or ground beef
  • 1 tsp low-sodium (or no-sodium) taco seasoning
  • 1/4 cup all-natural tomato sauce (no sugar added)
  • 1/4 cup shredded cheese (Mexican blend)
  • 1/4 cup + 2 tbsp fresh salsa
  • 2 tbsp chopped green onions
  • 2 tbsp chopped fresh cilantro

Recipe:

  1. Preheat oven to 400 degrees F.
  2. Lightly coat baking dish with non-stick cooking spray.
  3. Remove inner flesh from zucchini halves using a spoon or melon baller. Chop zucchini flesh and set aside.
  4. Place zucchini halves in baking dish, cut side up.
  5. Heat medium nonstick skillet, lightly coated with spray, over medium-high heat.
  6. Add diced onion and bell pepper. Cook, stirring frequently, for 3-5 minutes, or until onion is translucent.
  7. Add garlic. Cook, stirring frequently, for 1 minute.
  8. Add turkey. Cook, stirring frequently to break up turkey, for 4-5 minutes, or until no longer pink. Reduce heat to low.
  9. Add taco seasoning, tomato sauce, and zucchini flesh. Cook, stirring frequently, 4-5 minutes, or until heated through and well blended.
  10. Evenly divide turkey mixture into six zucchini halves. Top evenly with cheese. Bake for 20-25 minutes, or until zucchini is tender-crisp and cheese is melted.
  11. Top evenly with salsa, green onions, and cilantro.

Filed Under: Uncategorized · Tagged: taco, zucchini, zucchini boats

Egg Roll in a Bowl / Crack Slaw

August 8, 2018 · by fitdudefood ·

Share
egg roll in a bowl

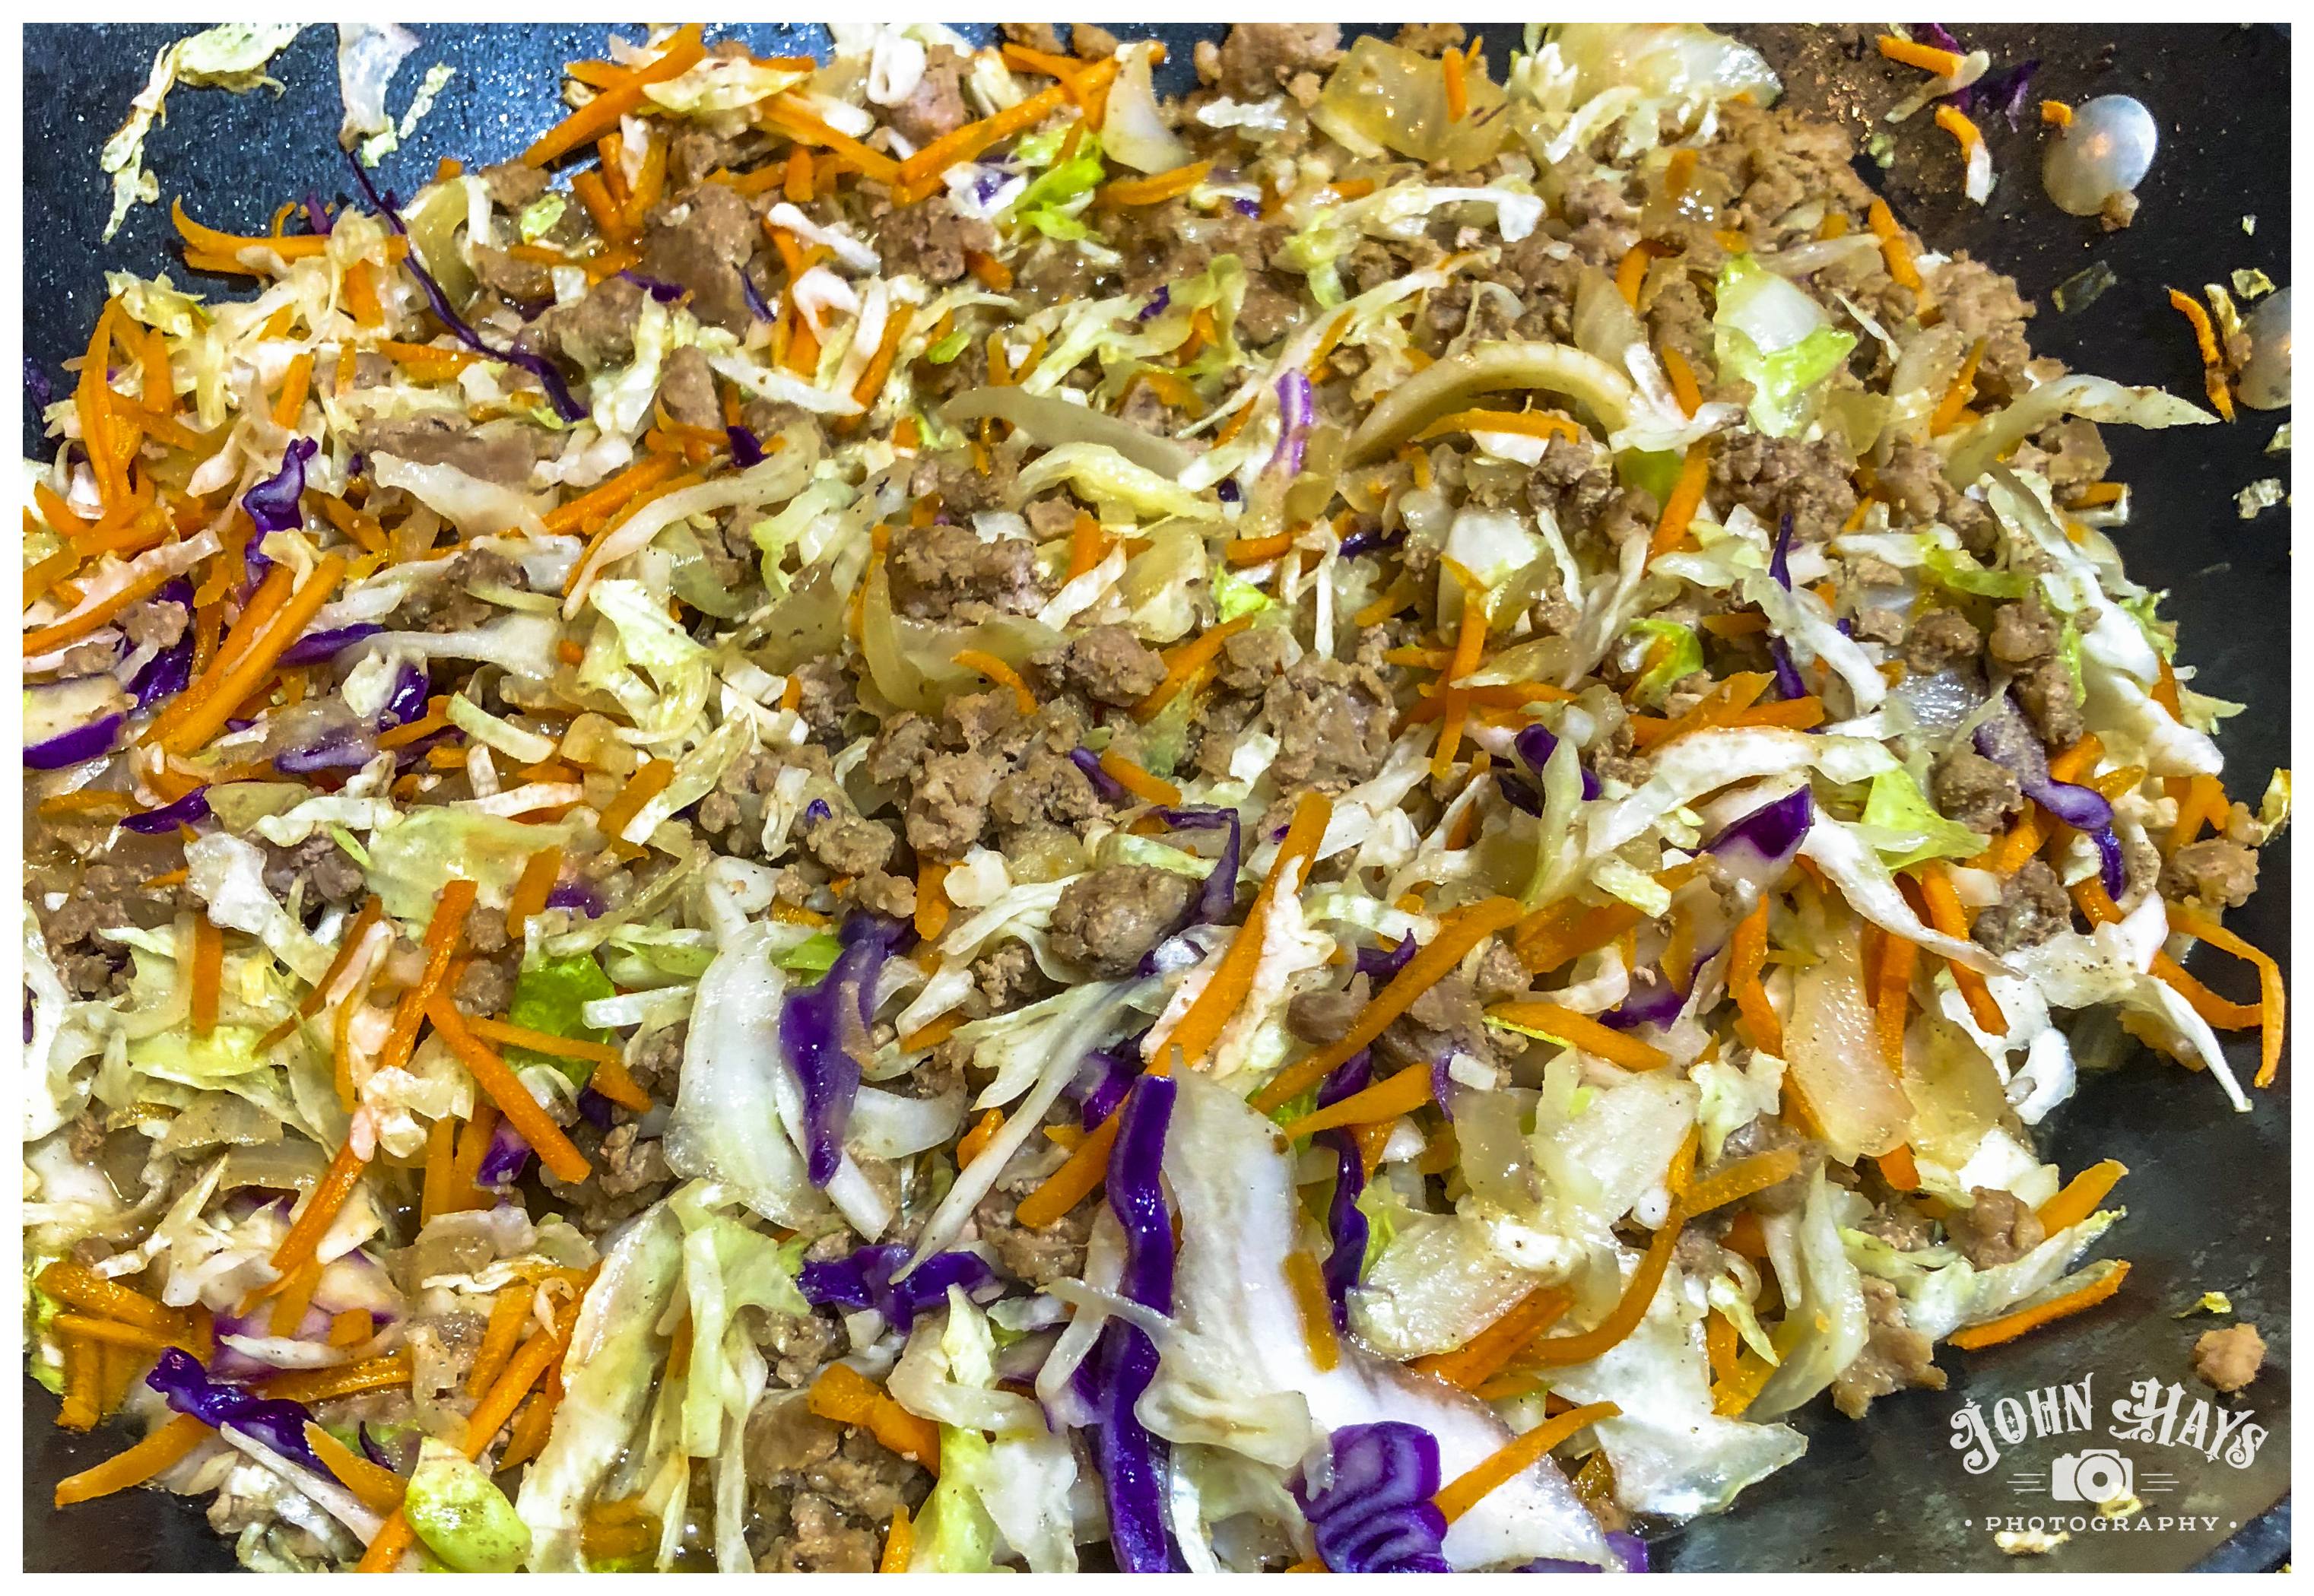
If you love egg rolls and / or cole slaw, you’re gonna LOVE this!

Prep time: 5 min
Cook time: 20 min

Ingredients:

  • 2 tbs sesame oil
  • 6 green onions sliced
  • 1/2 cup onion diced
  • 5 cloves garlic minced
  • 1 lb ground pork
  • 1 tsp fresh grated ginger
  • 2-3 tbs siracha or chili-garlic sauce or hot sauce
  • 14 oz bag coleslaw mix
  • 3 tbs coconut aminos or soy sauce
  • 1 tbs rice wine vinegar
  • 1/8 – 1/4 tsp white pepper or black pepper
  • himalayan pink salt to taste

Garnish

  • green onions from above
  • black sesame seeds

Creamy chili sauce

  • hot sauce / siracha
  • mayo

Recipe

  1. Heat sesame oil in a large skillet and place over medium heat.
  2. Add white parts of green onions, onion, and garlic and saute, stirring frequently, until onion begins to soften, about 5 minutes.
  3. Add ground pork, grated ginger, and 1 tbs hot sauce and cook until pork is browned, about 7-10 minutes.
  4. Add coleslaw mix, coconut aminos, rice wine vinegar, white pepper, and salt to taste, and stir until well combined. Cook, stirring regularly, until cabbage is tender, about 5 minutes.
  5. Meanwhile, in a small bowl whisk together 1/4 cup mayo and 1-2 tbs compliant hot sauce. Add a pinch of salt, to taste.
  6. To plate: spoon a hearty helping of the pork-cabbage mixture in a serving bowl. Drizzle creamy chili sauce over mixture. Garnish with green parts of the green onions and black sesame seeds.

Filed Under: Uncategorized ·

Spicy Dijon Breaded Chicken Thighs

March 10, 2018 · by fitdudefood ·


Share

chicken thighs

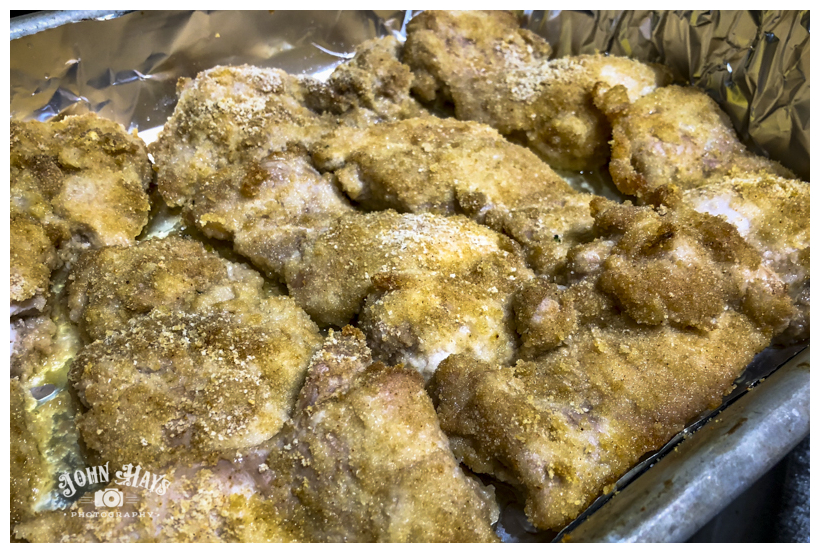
Spicy Dijon Breaded Chicken Thighs

Recently Krystle and I have started ordering from Butcherbox.  We had chicken thighs we needed to eat, and she was at work so I googled chicken thigh recipes and found one I scavenged from using the ingredients I had around the house.  Here’s what I came up with, it’s incredibly tasty!

Spicy Dijon Breaded Chicken Thighs
 
Save Print
Prep time
10 mins
Cook time
35 mins
Total time
45 mins
 
simple tasty dinner protein!
Recipe type: dinner
Ingredients
  • 4lbs chicken thighs
  • 2 cups dijon mustard
  • 4 cloves garlic
  • 2 tsp cayenne pepper
  • 3 tbs grass fed butter
  • 1.5 cups bread crumbs
  • Himalayan sea salt
Instructions
  1. Heat oven to 425
  2. Line large baking dish with nonstick aluminum foil
  3. In large bowl, mix diced garlic with melted butter, Dijon mustard, 1 tsp cayenne, and a dash of sea salt
  4. In separate large bowl, mix bread crumbs and 1 tsp cayenne pepper
  5. Dip chicken thigh into first bowl, thoroughly covering with mixture
  6. Dip chicken thigh into bread crumb bowl, covering both sides
  7. Repeat for all chicken thighs
  8. Place in dish
  9. Bake for 35 minutes
3.4.3177


Filed Under: Uncategorized ·

Shakeology Chocolate Mousse

February 26, 2017 · by fitdudefood ·


Share

Shakeology Chocolate Mousse
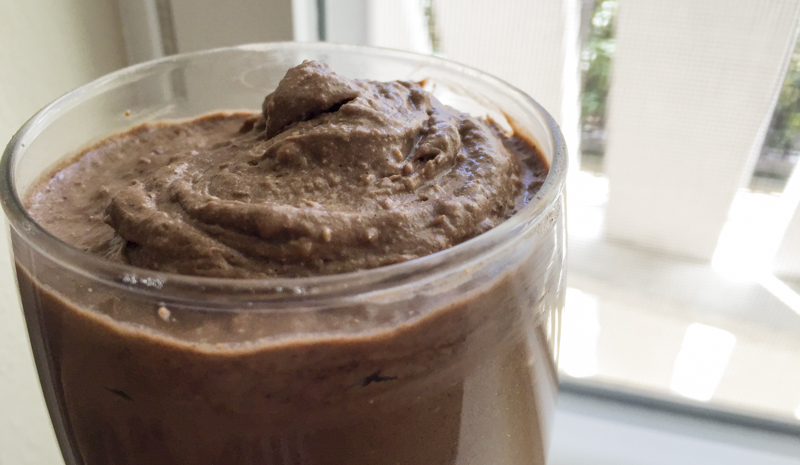
Shakeology Chocolate Mousse.

This is, by far, the best Shakeology recipe ever. I don’t say that lightly.

8 years ago in March, Shakeology exploded on the market, and people began experimenting with it, trying all kinds of things – shakes obviously, but also brownies, pancakes, cakes, pies, you name it.

Of course, the pudding idea was quick to spread, with the simplest and one of the tastiest recipes being to mix it with greek yogurt…it’s really tasty.

However, I have always loved the decadence of chocolate mousse…and I’ve had a hard time finding it, even in fancy restaurants. You usually wind up with some overly fanciful dab of chocolate ganache on a larger dessert dish, a hint of something that reminds you of true chocolate mousse.

Today, I have the solution…and I can say that it’s totally healthy, doesn’t cut any corners, doesn’t add any extra sweeteners, doesn’t cheat….and doesn’t disappoint to the chocolate mousse connoisseur.  My only regret is that my hand mixer isn’t powerful enough to eliminate all the coconut milk grains…but the taste and texture are a fun combination.

My girlfriend and I recently began using more canned coconut milk in our nutrition from following some of the Whole 30 recipe ideas. I had recently been making us a very tasty, yet dairy full dessert of whipping vegan chocolate Shakeology with heavy whipping cream when we were doing a high fat nutrition plan, but we really did want to move away from dairy, and when the coconut milk came along and we learned that refrigerating it causes it to split into cream and water…..well, I wasn’t about to let my treat go away.

I love experimenting with food, and this one hit the jackpot. It’s so simple, and so delicious. Go make it and see for yourself. Then take it to the next level by making it, serving it, and adding a dollop of freshly ground almond butter on top. It’s heaven.

If you prefer a chocolate icing texture, let it chill in the freezer for a few minutes afterward. Also, be sure to use CANNED coconut milk, NOT the kind in cartons.  Only the canned kind separates.

Shakeology Chocolate Mousse
 
Save Print
Prep time
3 mins
Total time
3 mins
 
The ultimate Shakeology dessert recipe, and the ultimate chocolate mousse recipe.
Author: John Hays
Recipe type: dessert
Serves: 2
Ingredients
  • vegan chocolate Shakeology
  • canned coconut milk
Instructions
  1. In a large mixing bowl, add 2 scoops vegan chocolate Shakeology with 1 can refrigerated canned coconut milk.
  2. Using an electric hand mixer, blend ingredients until desired consistency is achieved.
  3. Serve in bowls or wine glasses.
  4. Garnish with freshly ground almond butter, strawberries, etc..
3.4.3177


Filed Under: Uncategorized ·

Gluten Free Vegan Nachos

June 8, 2016 · by fitdudefood ·


Share

Nachos

Gluten Free Vegan Nachos

Gluten Free Vegan Nachos.  It doesn’t sound very appetizing, but this recipe is really tasty!  You’ll be quite satisfied and not even realize you’re eating a healthy alternative to this popular treat.

Begin by using these awesome Way Better black bean tortilla chips, totally gluten free and sprouted:

Way Better Chips

Then create the dairy free queso using this recipe: Dairy Free Queso Recipe

Finally, heat up Tasty Bite’s Madras Lentil chili:

Lentil Chili

Combine, heat, and enjoy!  Share your favorite add-ons below!


Filed Under: Uncategorized ·

Millet Snack

June 3, 2016 · by fitdudefood ·


Share

Millet Snack


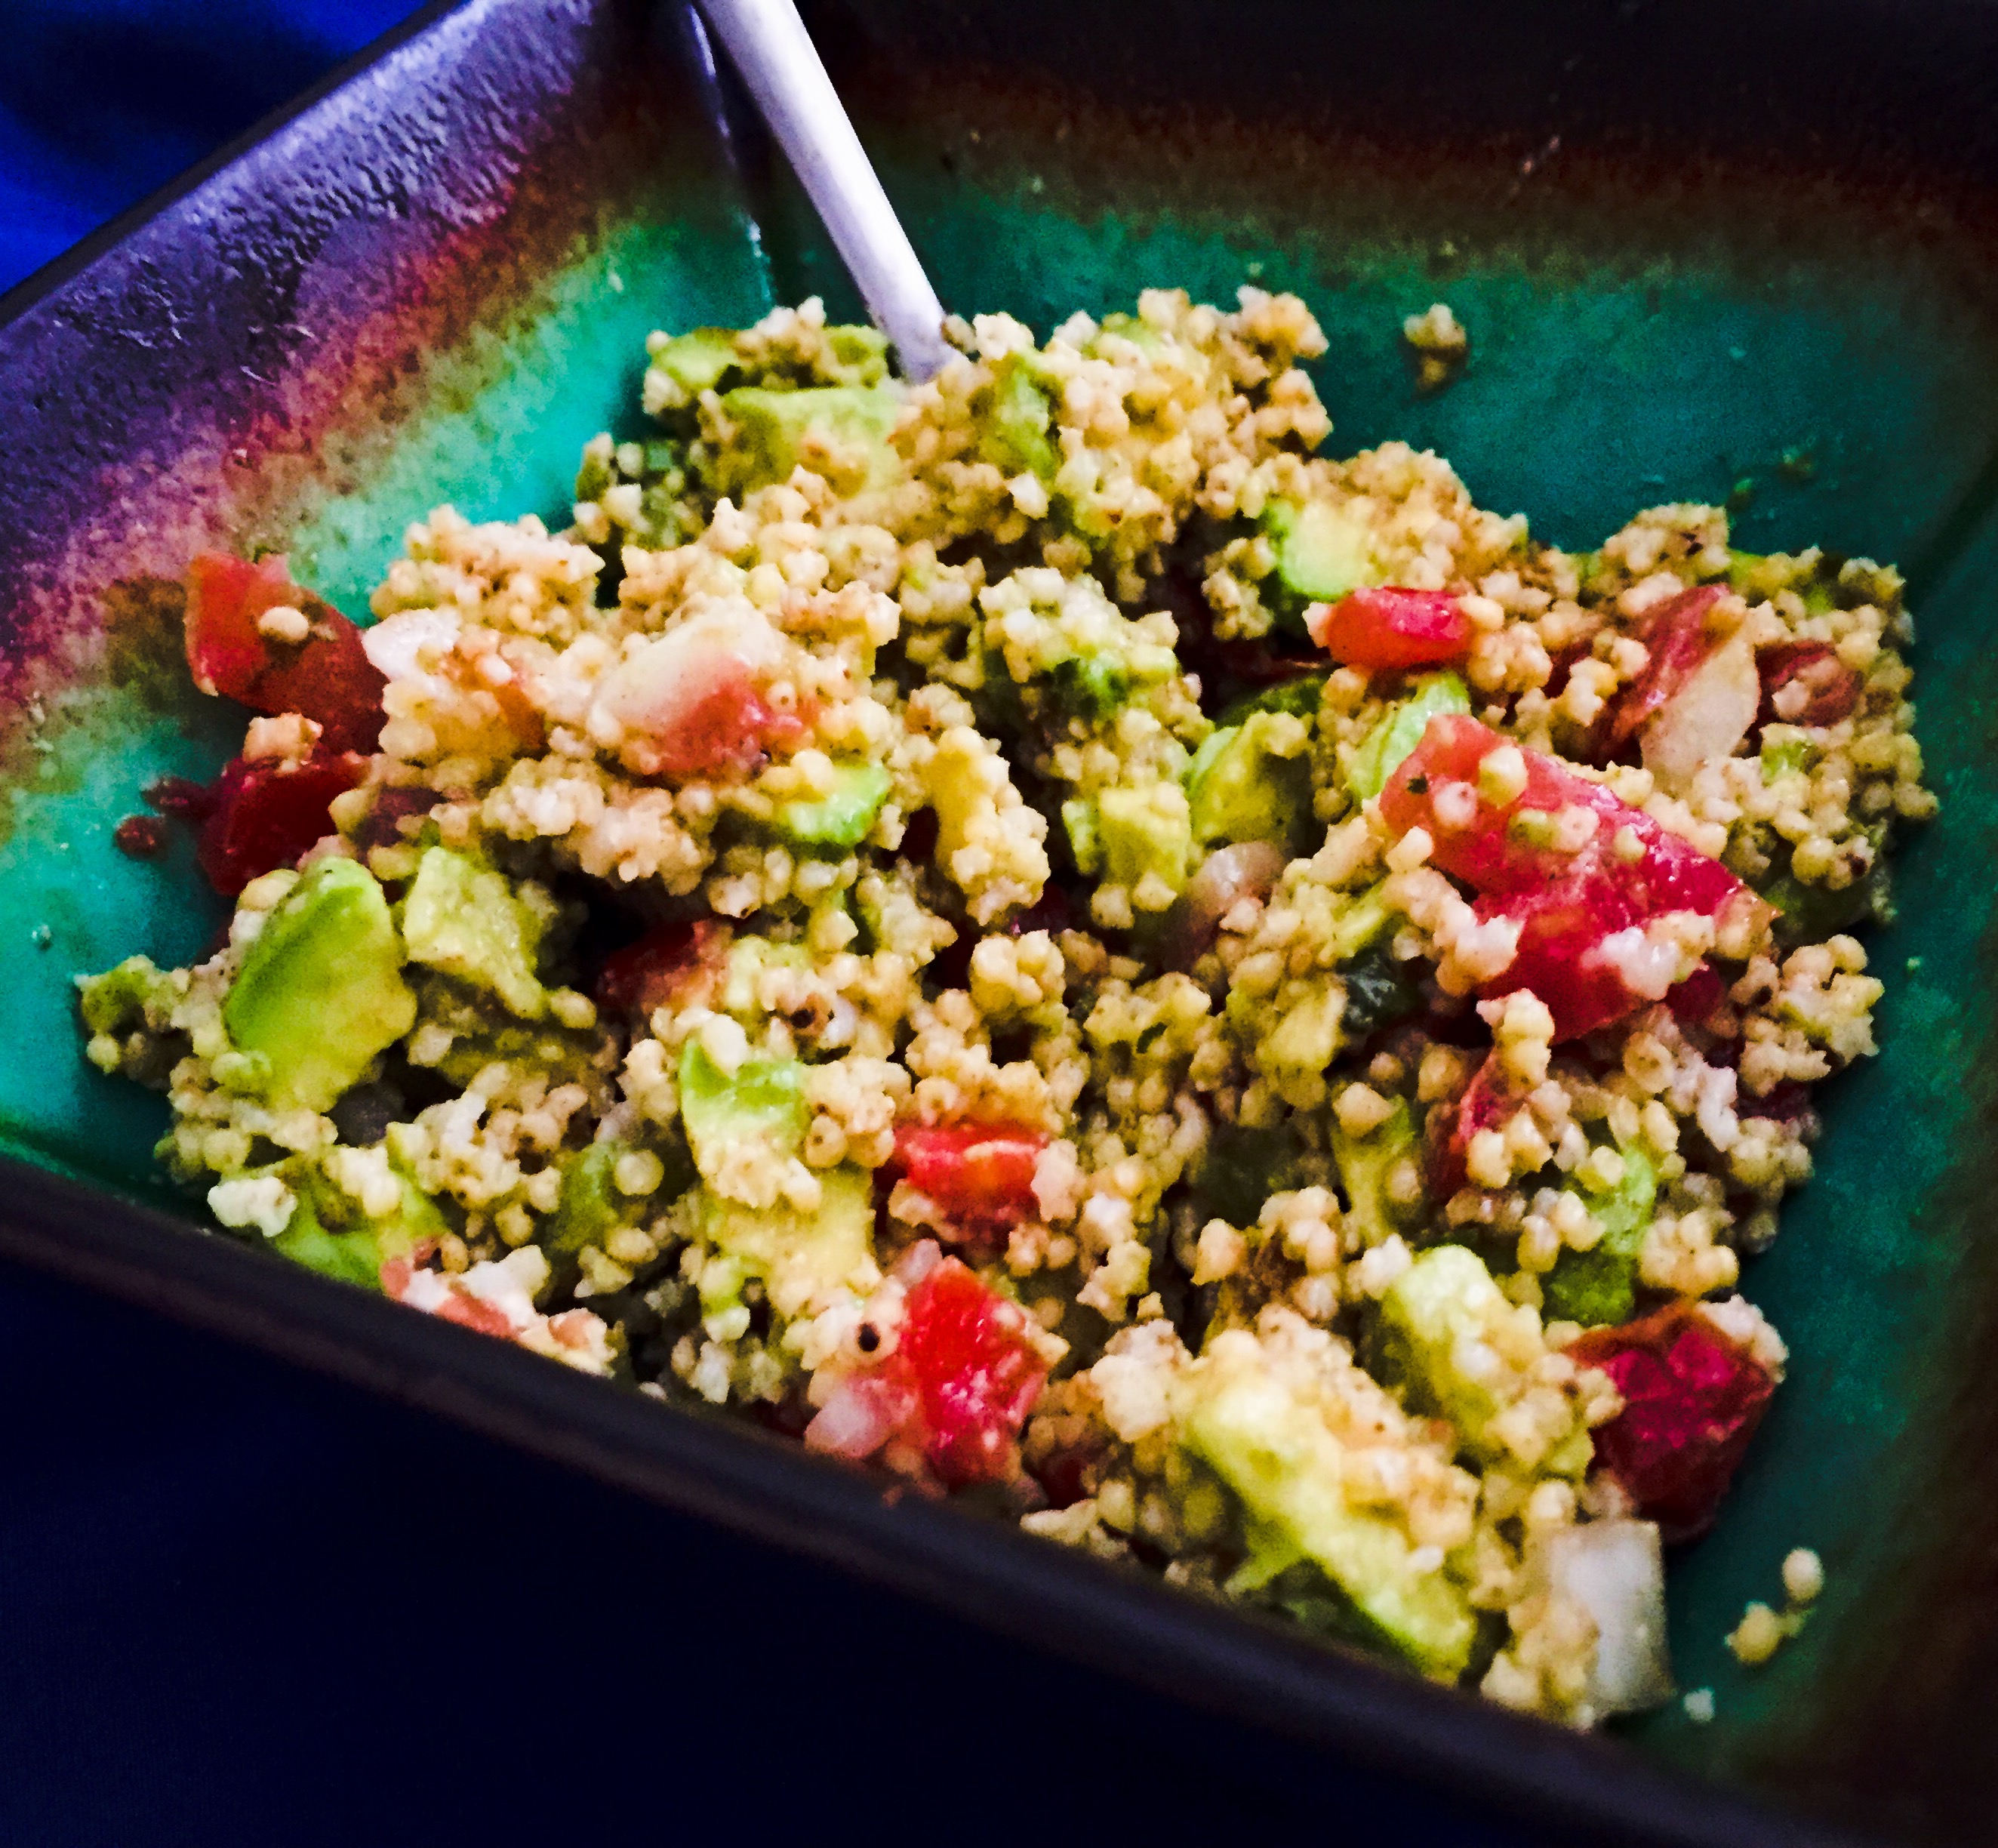
Millet Snack


The Ultimate Reset includes a few snack ideas that help keep you full while continuing to provide you dense nutrition on this 21 day detox plan.  This one is so tasty I had to post it because it’s now part of your regular weekly nutrition even after we’ve finished the Ultimate Reset.  You’ll want to add this to your meals too!

Millet Snack
 
Save Print
Prep time
5 mins
Cook time
30 mins
Total time
35 mins
 
Tasty filling healthy snack for any occasion!
Serves: 1 serving
Ingredients
  • ½ cup toasted millet
  • ⅓ medium avocado
  • 2 tbs fresh salsa or pico
  • 1 tsp cumin
  • 1 tsp cinnamon
  • ⅛ tsp cayenne
  • ⅛ tsp Himalayan sea salt
Instructions
  1. Heat saucepan over high heat
  2. Add millet, stirring constantly until millet starts to pop
  3. Slowly add 1 cup water and salt
  4. Bring to a boil
  5. Cook until all water has been absorbed and millet is translucent
  6. In salad bowl, mix all ingredients
  7. Enjoy!
3.4.3177


Filed Under: Uncategorized ·

Cashew Cheese Queso

April 11, 2016 · by fitdudefood ·


Share

Cashew Cheese


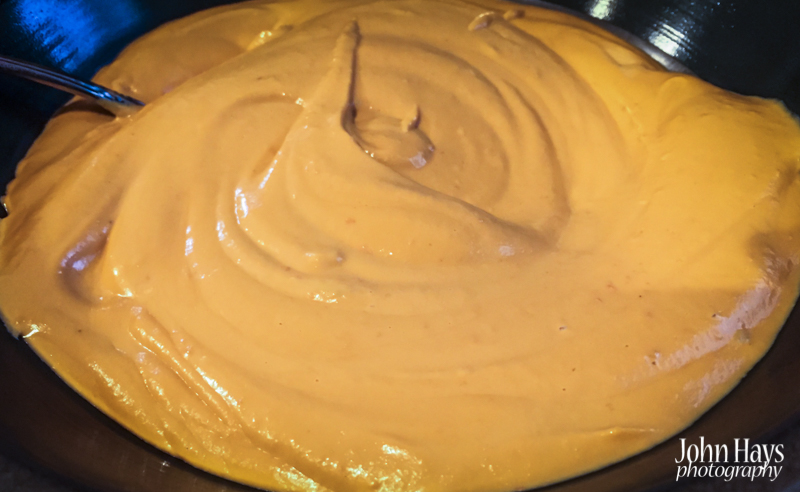
Cashew Cheese Queso

It’s becoming widely known that dairy just isn’t healthy.  We all grew up on milk and dairy, and now we’re finding that it simply has too many hormones and other nasty stuff that we need to avoid.  Problem is, cheese is just so tasty and addictive that many people can’t give it up.

That’s where vegan nut cheeses come in!  Now you can have your cheese, queso, nachos, whatever you like, without the guilt or health consequences later!  Whether it’s cashew cheese, almond cheese, etc…they all, when made correctly, truly do give a cheesy taste and are gaining popularity every day.  You can make macaroni and cheese, nachos, tacos, whatever you’d like without worrying about the harmful effects of dairy.  Vegan cheese is light years tastier than some of the healthy food alternatives were just a few years ago.

Enjoy Your Queso

This is a super simple amazingly tasty recipe for cashew cheese queso that will honestly satisfy your cheese craving and let you feel totally indulgent while still being totally healthy, which is what we all want, right?  It’s basically like a vegan velveeta.  You could probably even make a tasty Rotel dip with it.

Trust me, you’ll thank me for this one.

Thanks to Thekitchn.com for the recipe.

Cashew Cheese Queso
 
Save Print
Prep time
5 mins
Total time
5 mins
 
Truly tasty cheese queso without the guilt of dairy!
Ingredients
  • 2 large red bell peppers, roughly chopped
  • 2 large red bell peppers, roughly chopped
  • 2 cups raw cashews
  • 2 cups raw cashews
  • 1 cup nutritional yeast
  • 1 cup nutritional yeast
  • 2 tablespoons apple cider vinegar
  • 2 tablespoons apple cider vinegar
  • 1 garlic clove, optional
  • 1 garlic clove, optional
  • 1 teaspoon salt
  • 1 teaspoon salt
  • ½ teaspoon red chile flakes (or less, depending on your spice tolerance)
Instructions
  1. Soak the cashews overnight in cold water to remove harmful poisons. You should do this with all nuts.
  2. Combine all the ingredients in a blender, making sure the red peppers are on the bottom. Blend until a smooth sauce forms, adding a bit of water if the blender is having trouble blending.
  3. Transfer to a sealed container and refrigerate until ready to use. The cheese sauce will keep for up to 5 days in the fridge. Heat over a stove, NOT in a microwave.
3.4.3177

Filed Under: Uncategorized ·

Delicious Cauliflower Pizza Crust

February 5, 2016 · by fitdudefood ·


Share

cauliflower pizza crust

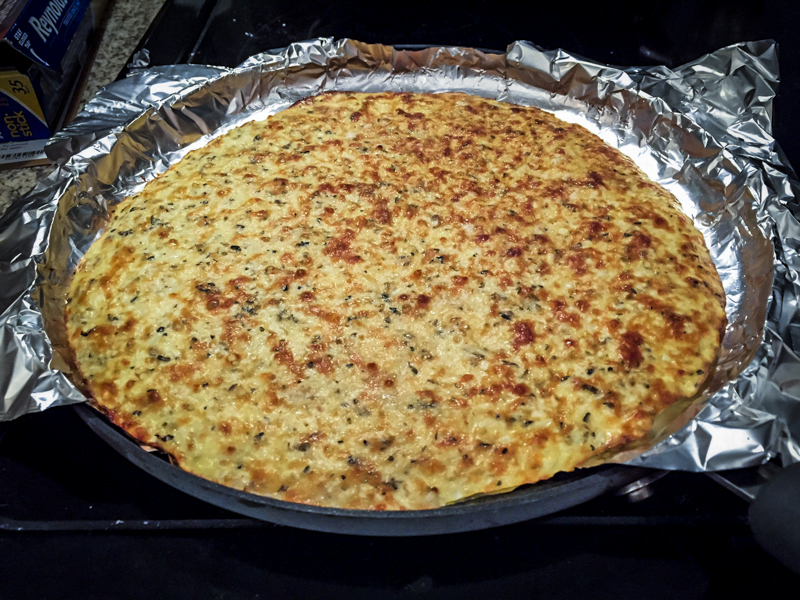
Cauliflower pizza crust

When I first heard about this I wrinkled my nose at it.  I’ve never liked cauliflower and my first and only attempt at making cauliflower rice for a stir fry left me with mush.  So when I tried this recipe I was skeptical.  Fortunately this time instead of using a powered food processor I used a hand crank variety and the cauliflower consistency came out much better.

cauliflower pizza crust

I was still skeptical even as I was putting the crust into the oven to cook.  It looked soupy and I wondered if this was going to be a complete disaster.

cauliflower pizza crust

Fortunately I was mistaken and was rewarded with a golden brown crust that was extremely tasty and totally passes for a regular pizza crust!  I urge you to try this cauliflower pizza crust recipe and enjoy! Gluten free and totally healthy, depending on the cheeses you choose!

cauliflower pizza crust

We happened to choose ground turkey and regular cheeses for ours, but in the future I’ll try cashew cheese or perhaps goat cheese on my cauliflower pizza crust!

Delicious Cauliflower Pizza Crust
 
Save Print
Prep time
15 mins
Cook time
20 mins
Total time
35 mins
 
Super healthy and tasty gluten free pizza
Recipe type: entree
Ingredients
  • 2 cups cauliflower, pulsed into grains
  • 2 cups shredded cheese, any variety
  • 2 garlic cloves, chopped
  • 4 eggs, beaten
  • 2 tsp dried basil
  • 2 tsp dried oregano
  • ½ tsp Himalayan sea salt
Instructions
  1. Take a head of cauliflower and break up into florets, throw into food processor and pulse.
  2. Place cauliflower grains in bowl and microwave for 3 minutes.
  3. Add egg, cheese, garlic, basil, oregano, and salt.
  4. Mix thoroughly.
  5. Pour onto flat cooking surface and bake at 450 degrees for 15-20 minutes.
3.4.3177


Filed Under: Uncategorized ·

Next Page »

Connect with John!

Tweets by @JohnHays

Search Posts

Copyright © 2022 | Innovative Child Theme by The Pixelista | Built on the Genesis Framework